Traditionally, chat bots are written in an asynchronous language (or one that supports async processing) such as NodeJS or Python. This isn't necessarily an architectural requirement though, as the premise of a Slack Slash Command for example is very similar to a normal HTTP request.
In this post, we will explore how to build a Slack Bot using Slack Slash Commands and Laravel.
The Slack Command Lifecycle
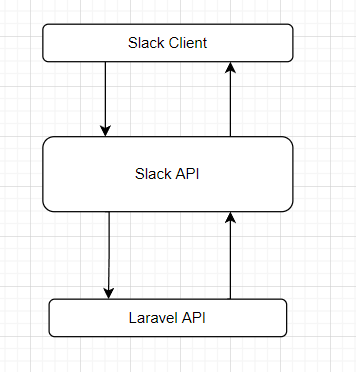
That's it: a normal HTTP request and response. Slash commands specify a callback URL where a POST request is sent. That request will contain information about the command that was run, the user who ran it, and the channel that it was run in.
For more information on Slash Commands, check out the Slack Documentation.
Slack does need to receive a 200 response from the callback URL, otherwise it will display an error to the user who ran the command. You may also specify a payload to return with the response, but we will discuss this more later.
Leveraging Laravel
We will be using Laravel as the API framework. As it would turn out, I have a package that facilitates the usage of Slack bot tokens. Yes, we will be using it :)
After spinning up your Laravel project, install the Slack package via composer:
composer require nwilging/laravel-slack-botThe above package includes a SlackCommandHandlerService which can be used to handle incoming slash command requests. In order to ingest command requests, you will need to do the following:
- Create a new
POSTroute (e.g./slack-command) - Create a new controller, and inject the
Nwilging\LaravelSlackBot\Contracts\Services\SlackCommandHandlerServiceContractas$slackCommandHandlerService - In the controller method to handle the route request, simply:
return $this->slackCommandHandlerService->handle($request);
Great, now your API is equipped to handle Slack Command requests. There are a few things we'll need to setup in order to actually make this work.
Command Handler
We are using the concept of a "command handler" - a class that is responsible for handling the incoming request for a given command.
This is made easy with the SlackCommandHandlerFactoryService. You will need to "register" each command handler inside of a service provider's (e.g. App\Providers\AppServiceProvider) register method. Before diving into this, let's look at what a command handler looks like:
<?php
declare(strict_types=1);

namespace App;

use Nwilging\LaravelSlackBot\Contracts\SlackCommandHandlerContract;
use Nwilging\LaravelSlackBot\Support\SlackCommandRequest;
use Symfony\Component\HttpFoundation\Response;

class SlackCommandHandler implements SlackCommandHandlerContract
{
    public function handle(SlackCommandRequest $commandRequest): Response
    {
        return response()->json();
    }
}
This is a very simple command handler. The handle method is required. Since these handlers are registered with the handler factory, they are built by the Laravel application container, and therefore you may use dependency injection via the __construct of a handler class.
For example:
<?php
declare(strict_types=1);

namespace App;

use Nwilging\LaravelSlackBot\Contracts\SlackCommandHandlerContract;
use Nwilging\LaravelSlackBot\Support\SlackCommandRequest;
use Symfony\Component\HttpFoundation\Response;
use Psr\Log\LoggerInterface;

class SlackCommandHandler implements SlackCommandHandlerContract
{
    protected LoggerInterface $log;

    public function __construct(LoggerInterface $log)
    {
    	$this->log = $log;
    }

    public function handle(SlackCommandRequest $commandRequest): Response
    {
        return response()->json();
    }
}
In the above example we are injecting the Psr\Log\LoggerInterface. The same may be done with any other dependency you wish to inject. These classes are structured similarly to Laravel jobs - they just are not dispatchable.
Now that you've got a command handler class, you must register it with the handler factory as mentioned previously:
<?php

namespace App\Providers;

use App\SlackCommandHandler;
use Illuminate\Support\ServiceProvider;
use Nwilging\LaravelSlackBot\Contracts\Services\SlackCommandHandlerFactoryServiceContract;

class AppServiceProvider extends ServiceProvider
{
    public function register()
    {
        $slack = $this->app->make(SlackCommandHandlerFactoryServiceContract::class);
        $slack->register(SlackCommandHandler::class, 'my-command');
    }
}
The SlackCommandHandlerFactoryService is registered as a singleton, so it may be created/instantiated anywhere via the Laravel application container to register new slack command handlers.
So what?
Right, what now? I've given you a very abstract example of how to handle slack commands, but haven't really explained how to create a bot have I? Actually, I have. Don't worry, I will give a much more robust example in a moment, but I do want to mention that - in my opinion - the spirit of software engineering is to be able to take abstract examples (such as the ones above) and create implementations based on your own needs. If you are able to understand why something happens, you will be far better equipped to create clean and efficient architectures that actually work :)
Now, let's talk about a bot.
We will create a bot that fetches weather data for a given location and returns it as a rich text message to the user. To retrieve the weather data we will use WeatherStack. It's a free weather API service, you'll just need to create an account to get an API key. Add that API key to your project's .env as the variable WEATHER_STACK_API_KEY.
Now let's setup a simple queued job that will be responsible for calling the weather API, formatting the data, and sending a rich text message to Slack.
<?php
declare(strict_types=1);

namespace App\Jobs;

use GuzzleHttp\ClientInterface;
use Illuminate\Contracts\Queue\ShouldQueue;
use Illuminate\Queue\SerializesModels;
use Nwilging\LaravelSlackBot\Contracts\SlackApiServiceContract;
use Nwilging\LaravelSlackBot\Support\SlackCommandRequest;

class WeatherQueryJob implements ShouldQueue
{
    use SerializesModels;

    protected string $query;

    protected SlackCommandRequest $request;

    public function __construct(string $query, SlackCommandRequest $request)
    {
        $this->query = $query;
        $this->request = $request;
    }

    public function handle(ClientInterface $httpClient, SlackApiServiceContract $slackApiService, string $weatherStackApiKey): void
    {
        //
    }

    protected function getWeatherIcon(\stdClass $data): string
    {
        return '';
    }

    protected function cToF(float $c): float
    {
        return (float) (($c * (9/5)) + 32);
    }

    protected function kmhToMph(float $kmh): float
    {
        return round((float) ($kmh / 1.609), 2);
    }
}
This is a simple scaffolded job. You'll notice we've included a couple of helper methods already - for converting metric units to imperial units. Let's start to fill in the rest.
Making the WeatherStack request
Inside the job's handle method, let's add some functionality to make an HTTP request to WeatherStack and decode the JSON response:
$weatherStackUrl = sprintf(
	'http://api.weatherstack.com/current?access_key=%s&query=%s',
	$weatherStackApiKey,
	$this->query
);

$result = $httpClient->request('GET', $weatherStackUrl);
$data = json_decode($result->getBody()->getContents());
If the request is successful, we will have an \stdClass object in $data.
Creating the Rich Message
Now comes the fun part: building the rich text message response. For this we will use the Layout Builder - Nwilging\LaravelSlackBot\Support\LayoutBuilder\Builder. Inside of the job's handle method, let's first instantiate the layout builder and add a header:
$layoutBuilder = new Builder();
$layoutBuilder->header(sprintf(
    '%s Current weather for %s, %s',
    $this->getWeatherIcon($data),
    $data->location->name,
    $data->location->region
));

$layoutBuilder->divider();
This will add a header and a divider. It will also add an icon to the header text depending on the weather description in the response. Since we're using the getWeatherIcon helper method now, let's go ahead and fill that in:
protected function getWeatherIcon(\stdClass $data): string
{
    $descriptions = $data->current->weather_descriptions;
    if (empty($descriptions)) {
        return '';
    }

    foreach ($descriptions as $description) {
        switch (true) {
            case stripos($description, 'partly cloudy') !== false:
                return ':sun_small_cloud:';
            case stripos($description, 'cloudy') !== false:
                return ':cloud:';
            case stripos($description, 'partly sunny') !== false:
                return ':partly_sunny:';
            case stripos($description, 'sunny') !== false:
                return ':sunny:';
        }
    }

    return '';
}
There are other weather descriptions that aren't accounted for here, so feel free to do some digging into the weather stack API docs if you're interested in adding more icons.

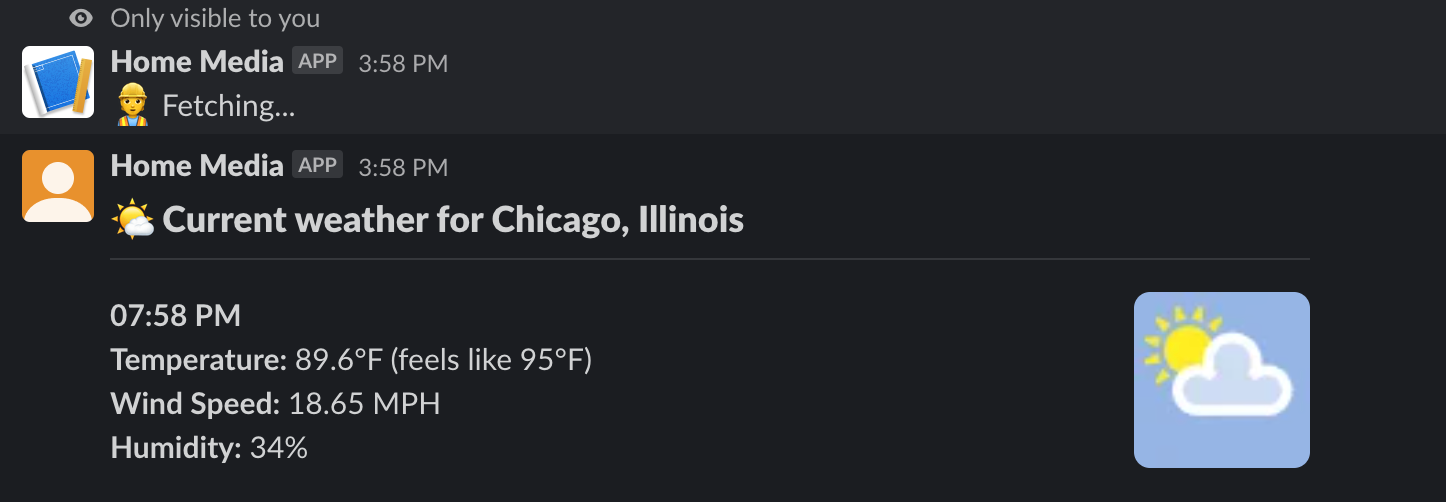
Now that we've got that helper method filled in, we can continue building our layout. Back in the job's handle method, let's add a block of markdown text that will describe the current weather condition:
$weatherDescription = "*" . $data->current->observation_time . "*\r\n"
    . "*Temperature:* " . $this->cToF((float) $data->current->temperature)
    . "°F (feels like " . $this->cToF((float) $data->current->feelslike) . "°F)\r\n"
    . "*Wind Speed:* " . $this->kmhToMph((float) $data->current->wind_speed) . " MPH\r\n"
    . "*Humidity:* " . $data->current->humidity . "%";
This $weatherDescription variable now holds a block of text that we wish to add to our rich text message. To do this, we will first create a Section block, then add the text to it:
$section1 = new SectionBlock();
$section1->withText($layoutBuilder->withMarkdownText($weatherDescription));
Weather stack also returns a "weather icon" PNG image in certain cases. We can add this as an "accessory" element to the section if it is available:
if (!empty($data->current->weather_icons)) {
    $image = new ImageElement($data->current->weather_icons[0], 'Weather Icon');
    $section1->withAccessory($image);
}
Don't forget to add the section to the layout builder:
$layoutBuilder->addBlock($section1);At this point, you're ready to send the message!
$slackApiService->sendBlocksMessage($this->request->channelId, $layoutBuilder->getBlocks());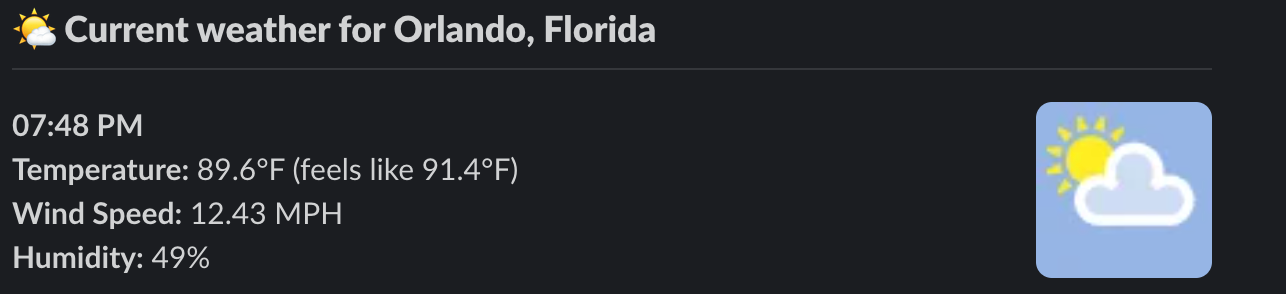
Slack Setup
I won't go too in-depth with the Slack setup, since the Slack docs are pretty comprehensive and it's always a good idea to become familiar with the backend of the tooling you plan to use - therefore, I do encourage you to explore Slack's documentation and the application management panel.
I will write this section with the assumption that you already have created/know how to create a Slack App.
Head over to the Slack Apps Homepage and click on the app you wish to use for this project. You will be landed on the Basic Information page. Scroll down the page a bit and find the Signing Secret credential. Copy this value and place it in your project's .env as the variable SLACK_API_SIGNING_SECRET.
Next, navigate to the OAuth and Permissions section of the application management panel. First, ensure that the following scopes are present (`incoming-webhook` is optional):
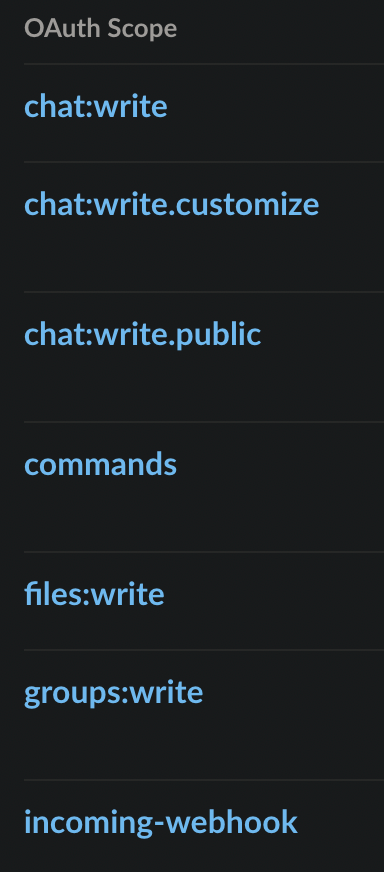
Next, copy the Bot User OAuth Token from above and place it in your project's .env as the variable SLACK_API_BOT_TOKEN.
Finally, navigate to the Slash Commands section of the application management panel. This is where all of your slash commands are configured. Each command should use the request URL from your Laravel project:
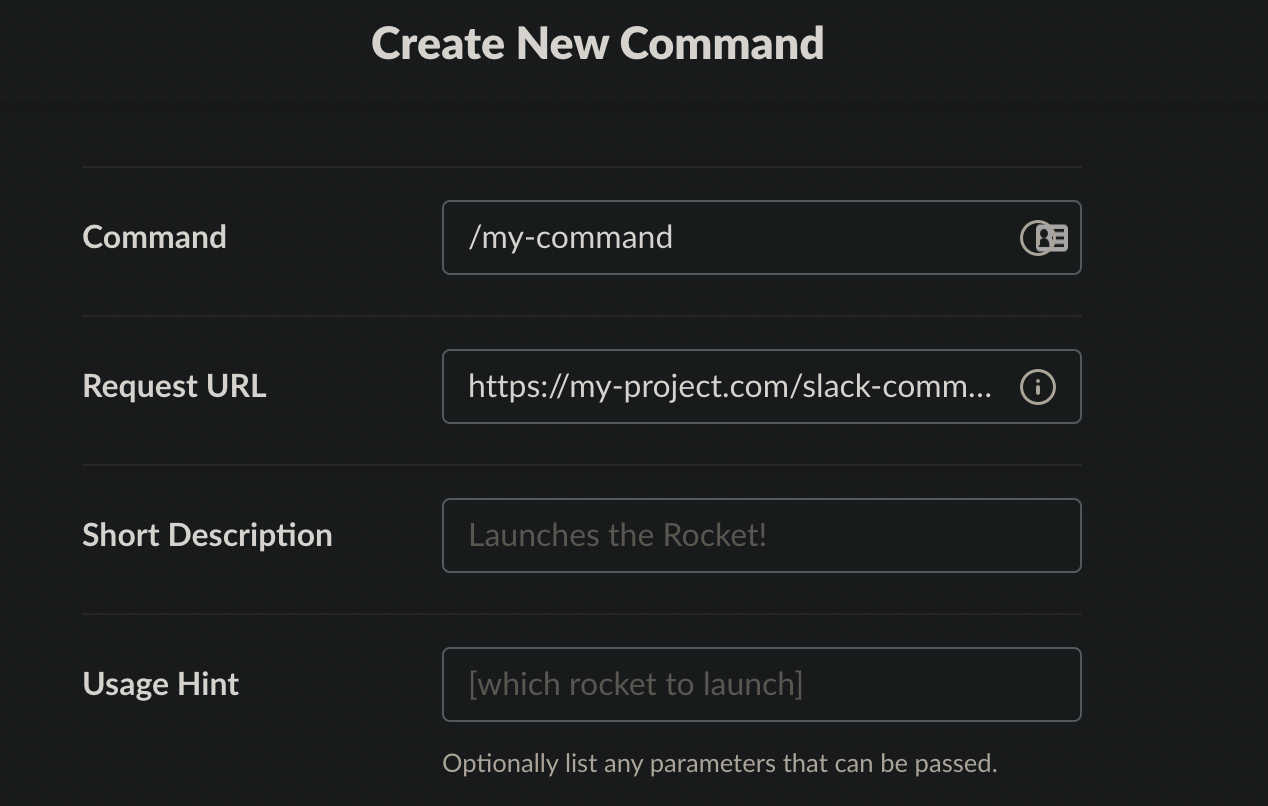
Once all of that is completed and saved, you're ready to test your command!
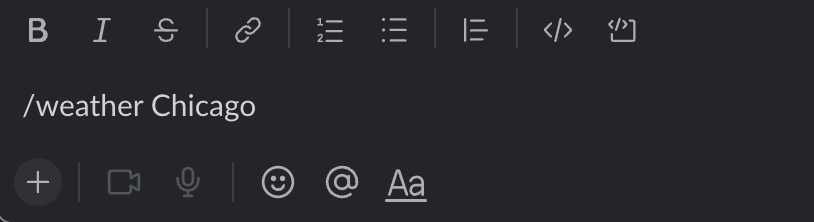
Tada! You now have a working weather bot for slack. Simply call the slash command with a location as the only argument.
For the source code of this project, check out the Github Repository. The code in this repository has a few examples of a much better dependency injection design and will provide more information on how the queued job is created via the application container.